CROSSY ROAD PROJECT
INFO
This project belongs to CEA.
Introduction
This project, titled "CROSSY ROAD," involves developing a video game that replicates Crossy Road with a few customizations.
Additionally, the goal of this project is to develop a robot capable of playing the game despite the imposed difficulty.
This project also allows us to practice and deepen our project management skills by considering:
- Task distribution on
GitHub - Organizing the source code using
git - Working in
Agilemode with issue management by sprint using defined milestones - Maintaining the Kanban board on
GitHub
Before starting game development, several UML diagrams were created to better understand the game's design, including:
- Class Diagram: To understand how the classes interact and base the development of the main game engine on this diagram.
- Activity Diagram 1: To explain the game's logic the player will face in their environment.
- Activity Diagram 2: Specific to the robot, implementing its movement logic.
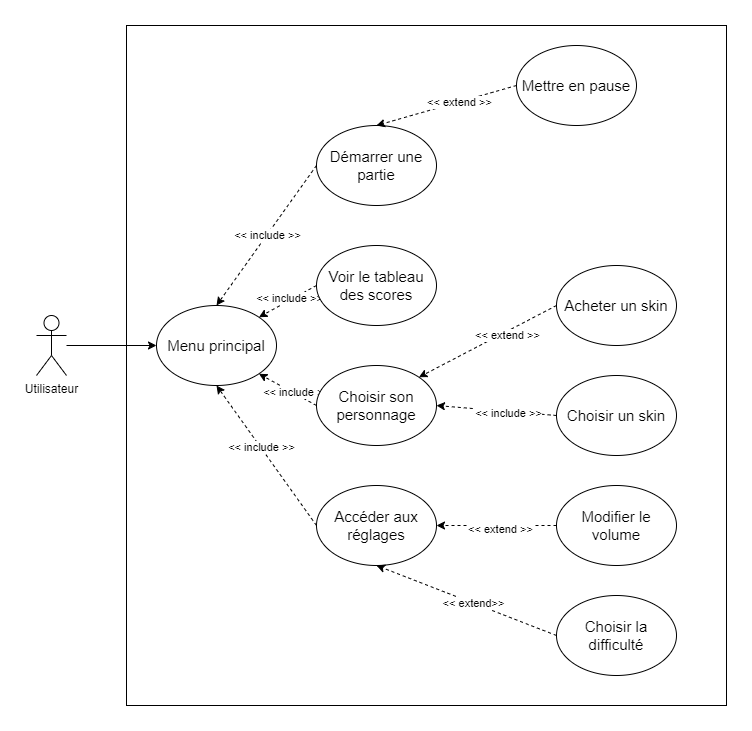
- Use Case Diagram: To detail the various actions the user can perform on the game's UI, from the Menu to the in-game section.
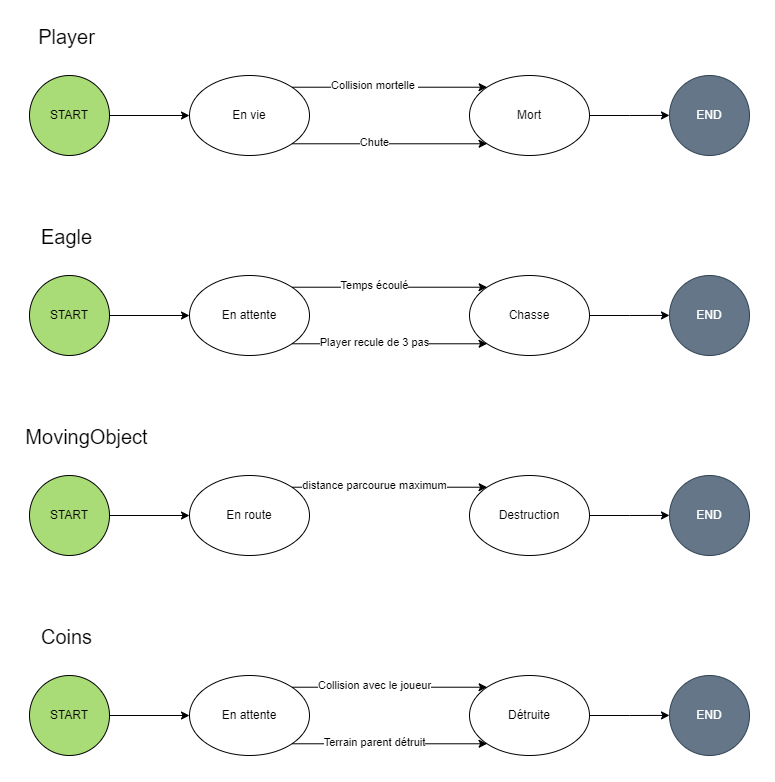
- State Transition Diagram.
A significant part of the project also focused on learning the game engine used to develop the game: Unity3D, as well as 3D modeling tools like Blender and Voxel (MagicaVoxel) to visually replicate the game as closely as possible.
📈 UML Analysis
As mentioned earlier, below are the various UML diagrams created for this project, including the class diagram, activity diagrams, use case diagram, and state transition diagram.
Class Diagram
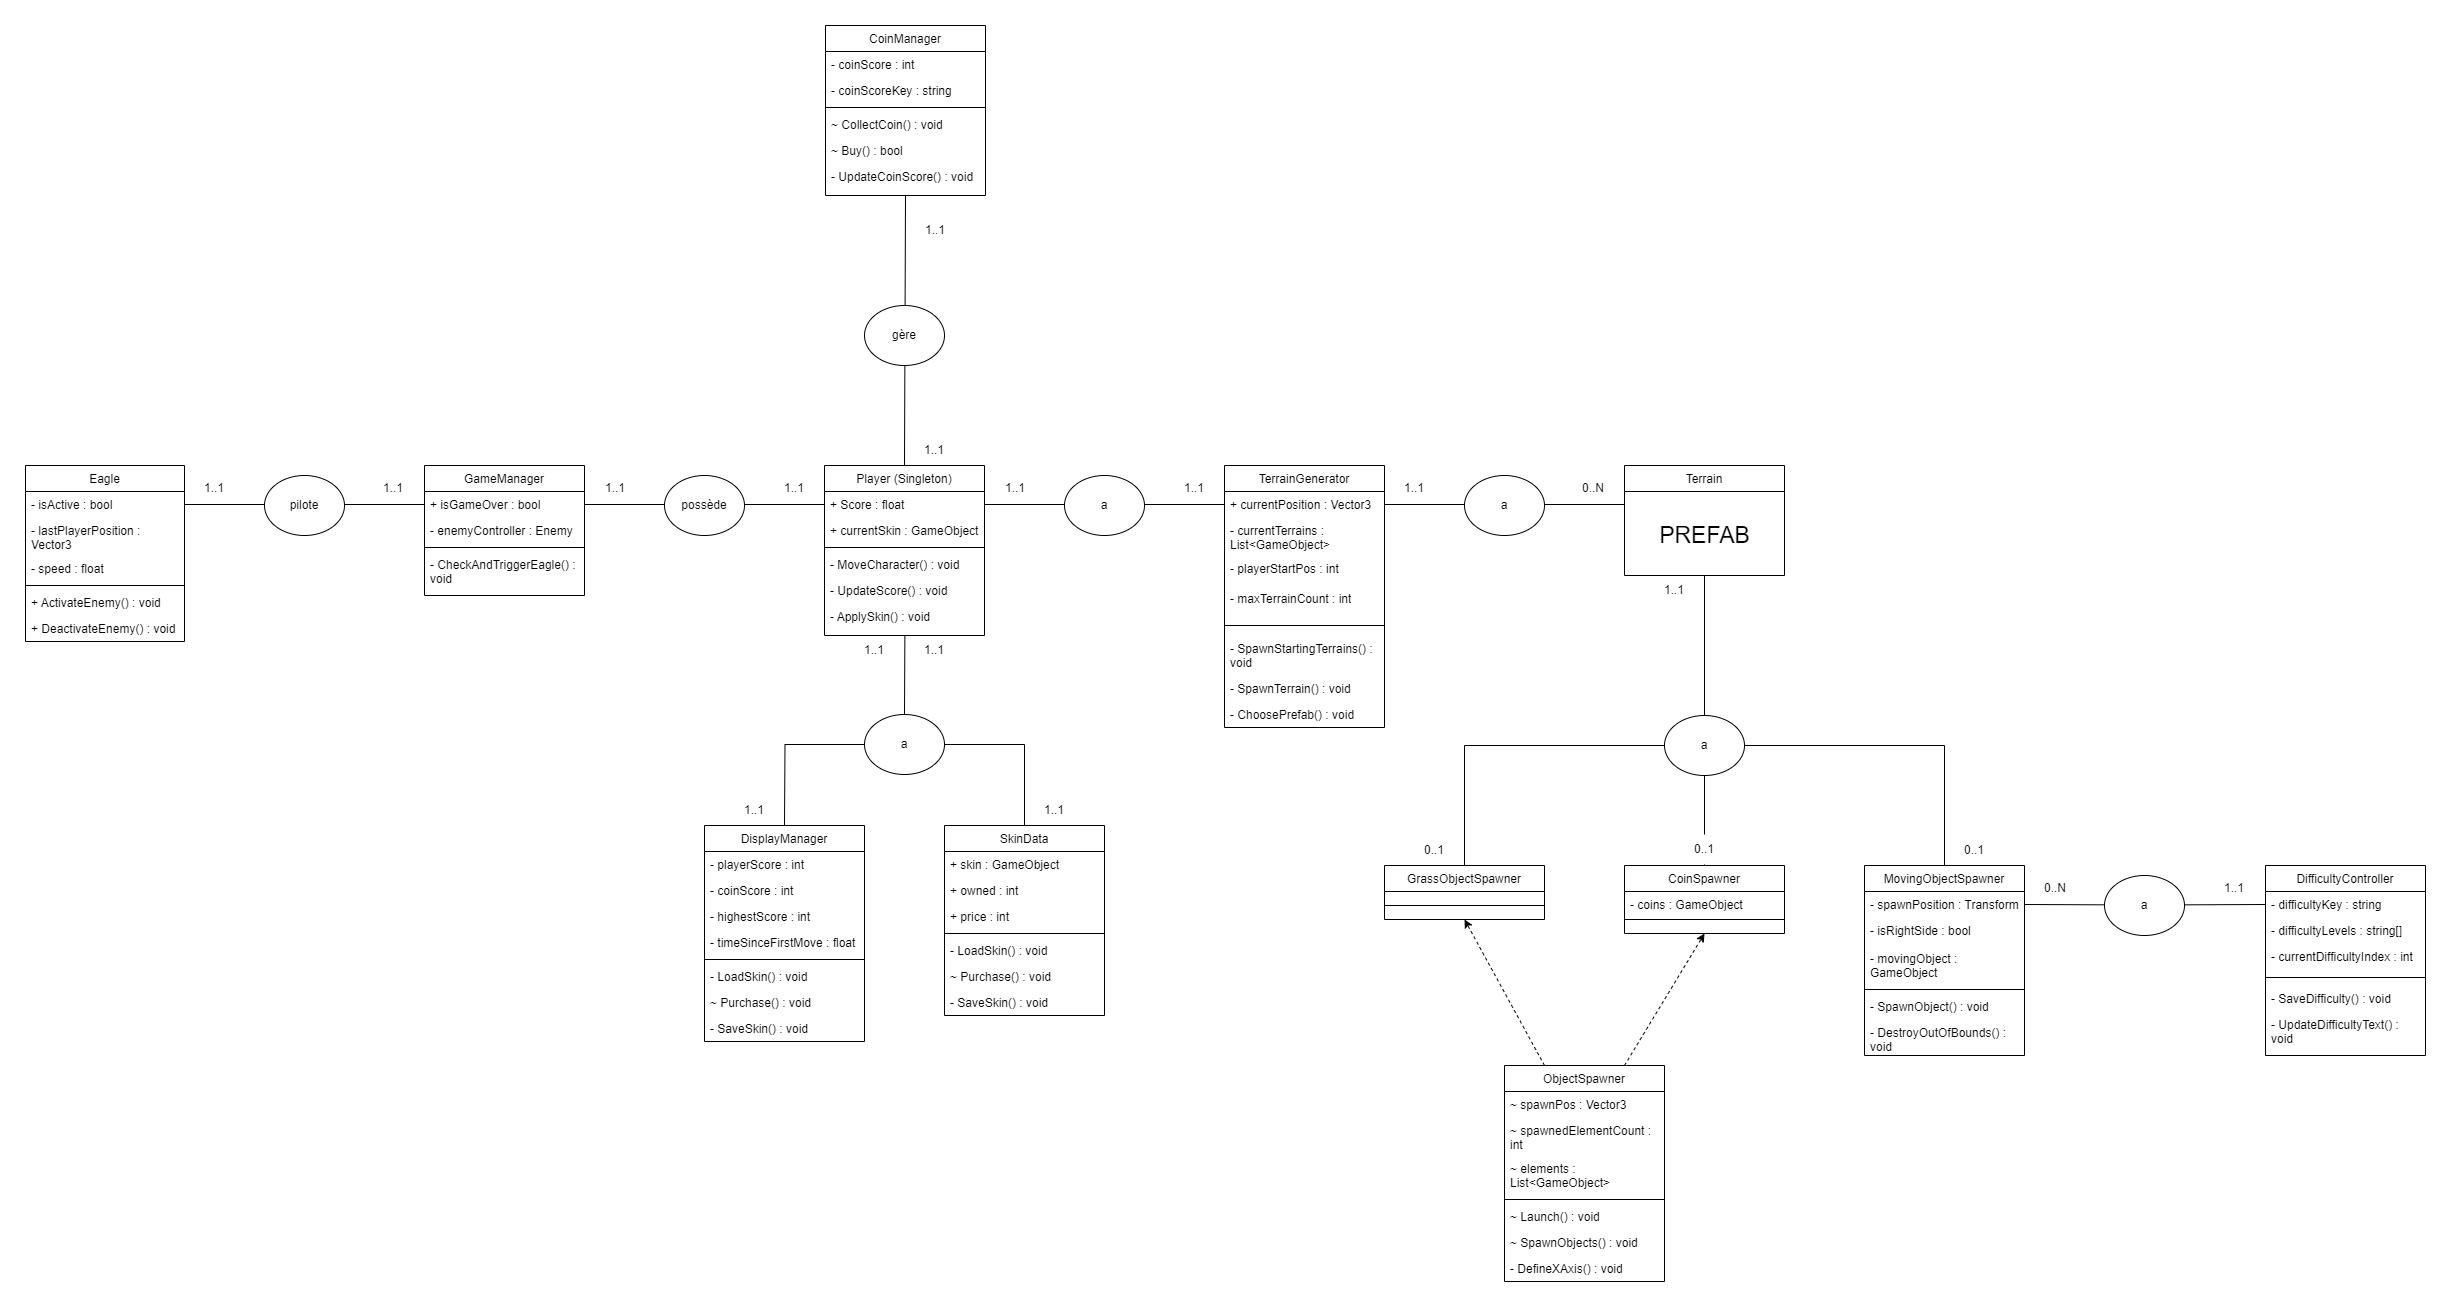
Why is the Player class a Singleton?
As the central class in the game, and since there is only one Player instance in a game like Crossy Road, this class is not meant to be instantiated in other classes. Therefore, this class was designed as a static class in the code, similar to how Unity handles it.
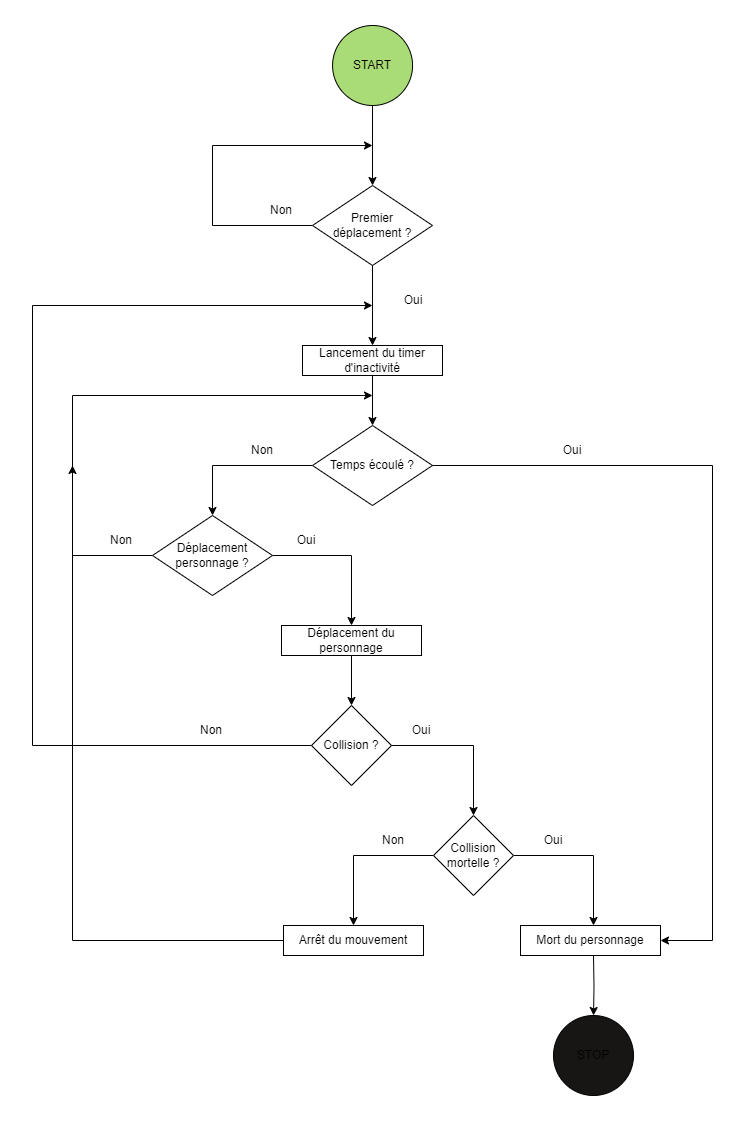
Activity Diagram 1: Player
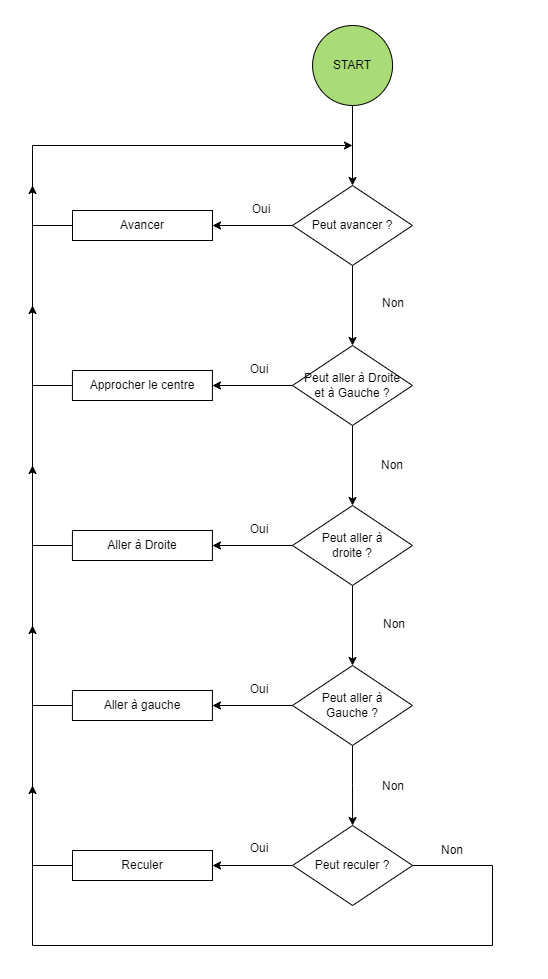
Activity Diagram 2: Robot
Use Case Diagram
State Transition Diagram
📝 Project Management
For project management, several steps were followed, starting with project planning, with meeting reports available in the folder, followed by project execution guided by issue management and Agile methodology using milestones on GitHub.
Project Planning
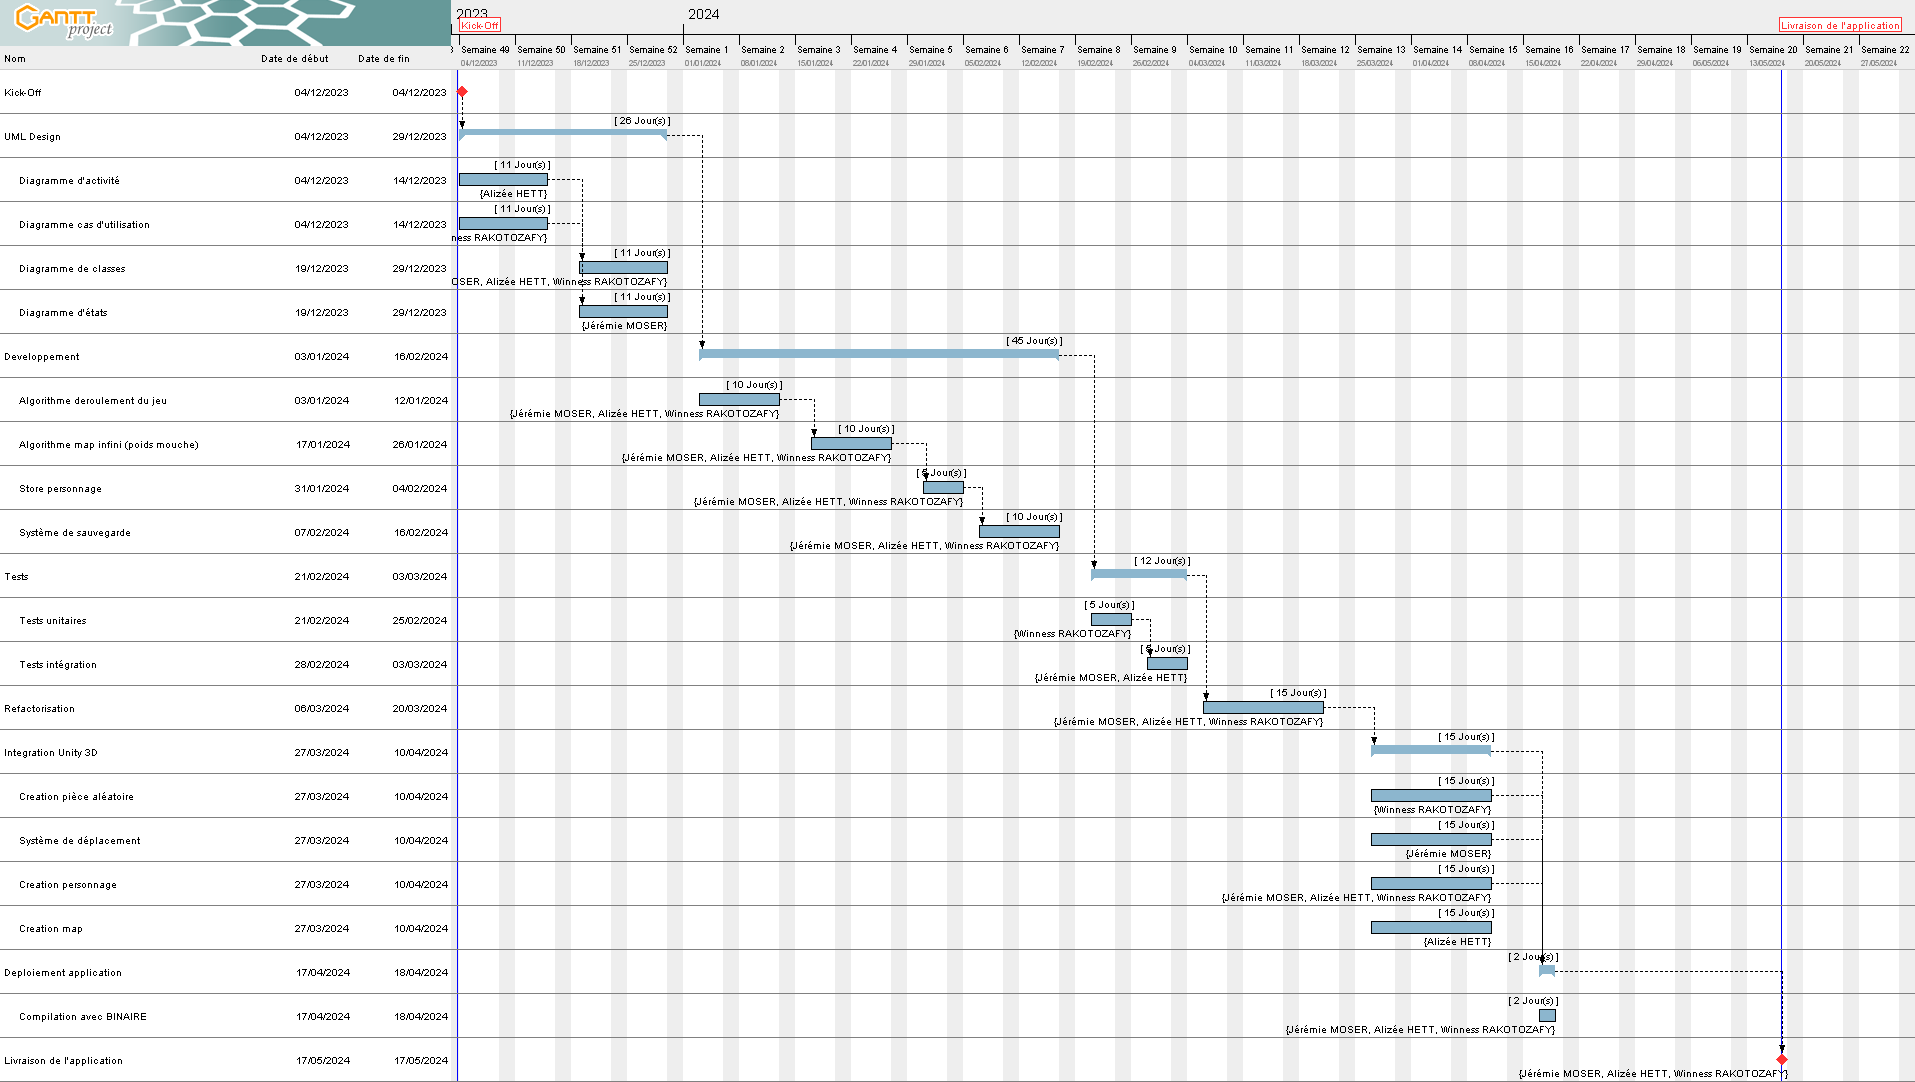
To shape the project plan, we created an initial Gantt chart to schedule the project's various tasks.
However, like any project, there were some uncertainties that impacted the project timeline, creating a significant gap between the initial Gantt chart and the final one.
One of the most notable discrepancies was in project standardization, where we faced delays due to each team member learning Unity at their own pace.
Additionally, some tasks and achievements were added to the Gantt Chart, formalized as a Roadmap on GitHub. Conversely, some tasks were removed from the plan/Gantt Chart, particularly those that were not initially part of the SPECIFICATIONS, and were deemed optional by the team.
Below are the initial and final Gantt charts, reflecting the project's planning and execution.
Initial Gantt Chart
Final Gantt Chart
The final Gantt chart is accessible in our GitHub project via the following link: Final Gantt Chart.
Project Organization with Git
For project organization with Git, we followed a structured methodology with multiple branches:
- The main branch is protected and only accepts functional and stable code.
- The development branch integrates project progress and milestones.
- Additionally, several other branches, either individual or based on specific features, were created for thorough testing and temporary code modifications.
Project Execution
During the project execution, each team member took responsibility for developing the game and ensuring its success:
- @Dinholu, aka Alizée H., in her role as project manager, mainly oversaw the project by scheduling weekly meetings to review issues and code. Sprints were defined through milestones, and each member had to close their issues to achieve the project's goals. In terms of development, she was responsible for the game's sound management, code review/refactoring to maintain code readability, setting up the main menu and its options, and developing/optimizing the robot's detection.
- @EpitronX, aka Jérémie M., in his role as developer, handled the object spawn algorithm on the terrain, the train detection algorithm and train arrival signal, the game's camera management, and setting up the game's boundaries.
- @WRKT, aka Winness R., in his role as developer, was responsible for the game's graphical modeling and various models using Blender. His main goal was to replicate the original game as accurately as possible. He also contributed to optimizing the terrain generation algorithm, creating the main character and its enemy (eagle), optimizing the game's collision logic, and developing the robot.
👎 Challenges Faced
Throughout the project, several challenges were encountered, mainly due to the team's lack of Unity expertise and the time required to learn the technology.
Additionally, because of this lack of knowledge, several Unity best practices were not applied to the project.
Furthermore, organizational challenges arose, particularly in team communication, where each member's availability was not always clear. Since each member had different skills and abilities in certain areas, some issues were reassigned to ensure the project's success.
Finally, on the technical side, the biggest challenges we faced were:
- Not using the Z-axis as the forward axis, instead of the X-axis we initially chose.
- Incorrect use of
Start()andAwake()functions, whereAwakewould have been more optimal for variable initialization. - Collision management with
Raycastsfor obstacles. - Developing the robot and its early detection of moving objects to optimize its decisions.
- Implementing the robot's movement algorithm in the environment.
- Managing player animations, both for jumping and character death.
- Managing the player's lifecycle, where they shouldn't be immediately destroyed upon death, as this could interfere with the animation.
📓 User Documentation
How to play our Crossy Road game? 🔥 Follow the guide below:
Main Menu
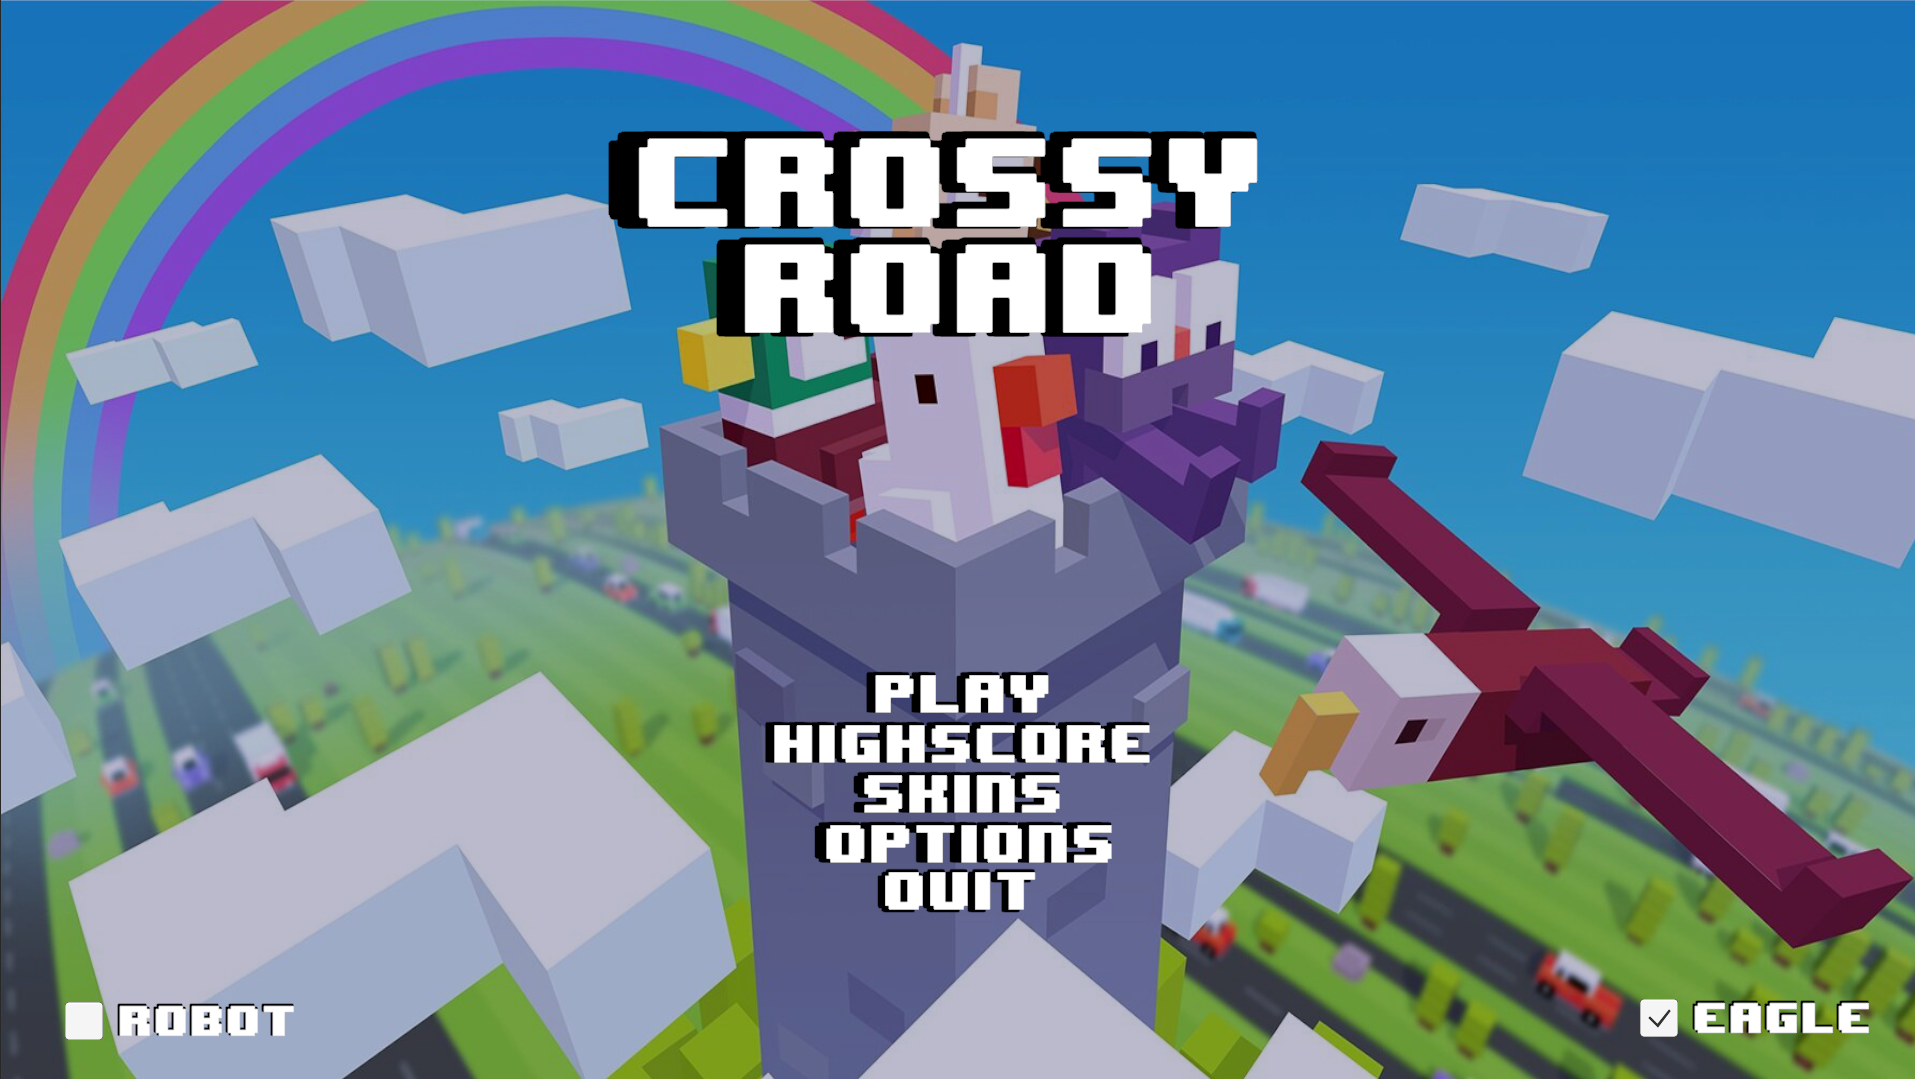
On the main menu, you can perform different actions depending on the button clicked.
- Click
PLAYto start the game with the default skin (Chicken) and default settings (difficulty: medium, volume: 50%). - Click
HIGHSCOREto view the game's leaderboard, ranked by difficulty, as detailed in the Highscore section. - Click
SKINSto choose the character skin, unlockable with in-game currency earned by playing. - Click
OPTIONSto adjust the game settings, including difficulty and sound volume (especially the jump sound! :trollface:). - Check
ROBOTto activate robot mode and watch the robot play on its own. It may not be perfect, but its movements can be amusing to watch. - Check
EAGLEto enable or disable the eagle that attacks the player if they stay inactive for too long. ⛔ WARNING: If you love challenges, it's best to enable it. - Click
QUITto exit the game.
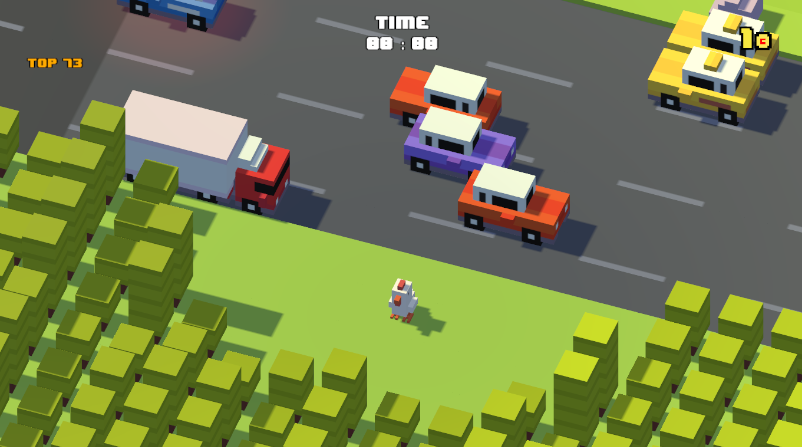
In-game
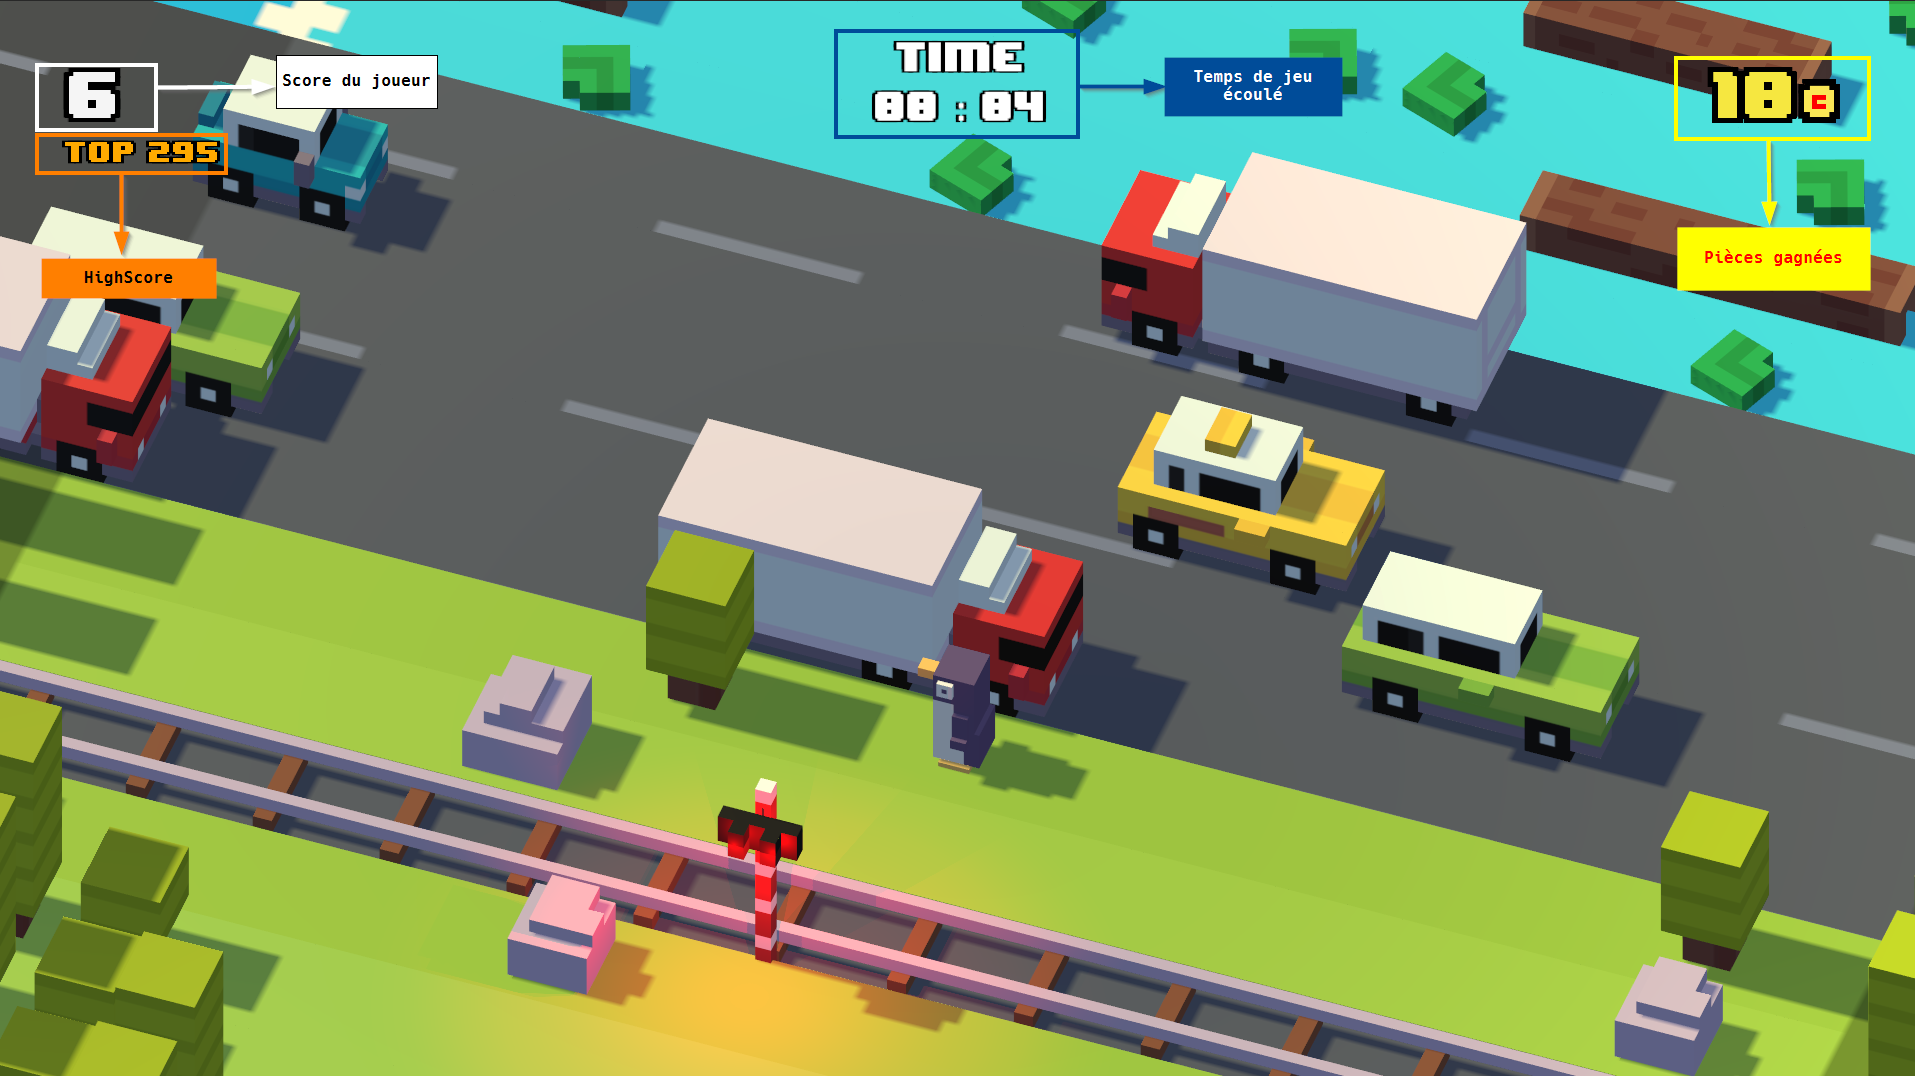
In-game, you will see the various dashboard information as shown in the previous image.
Player Movement
- Press the
UPorZkey to move forward. - Press the
DOWNorSkey to move backward. - Press the
LEFTorQkey to move left. - Press the
RIGHTorDkey to move right.
Avoid the Enemies 💀
Do your best to avoid enemies, and pay close attention to the movement of logs on the water, as they can cause problems if ignored.
Pause the Game
Press the ESC key to pause the game.
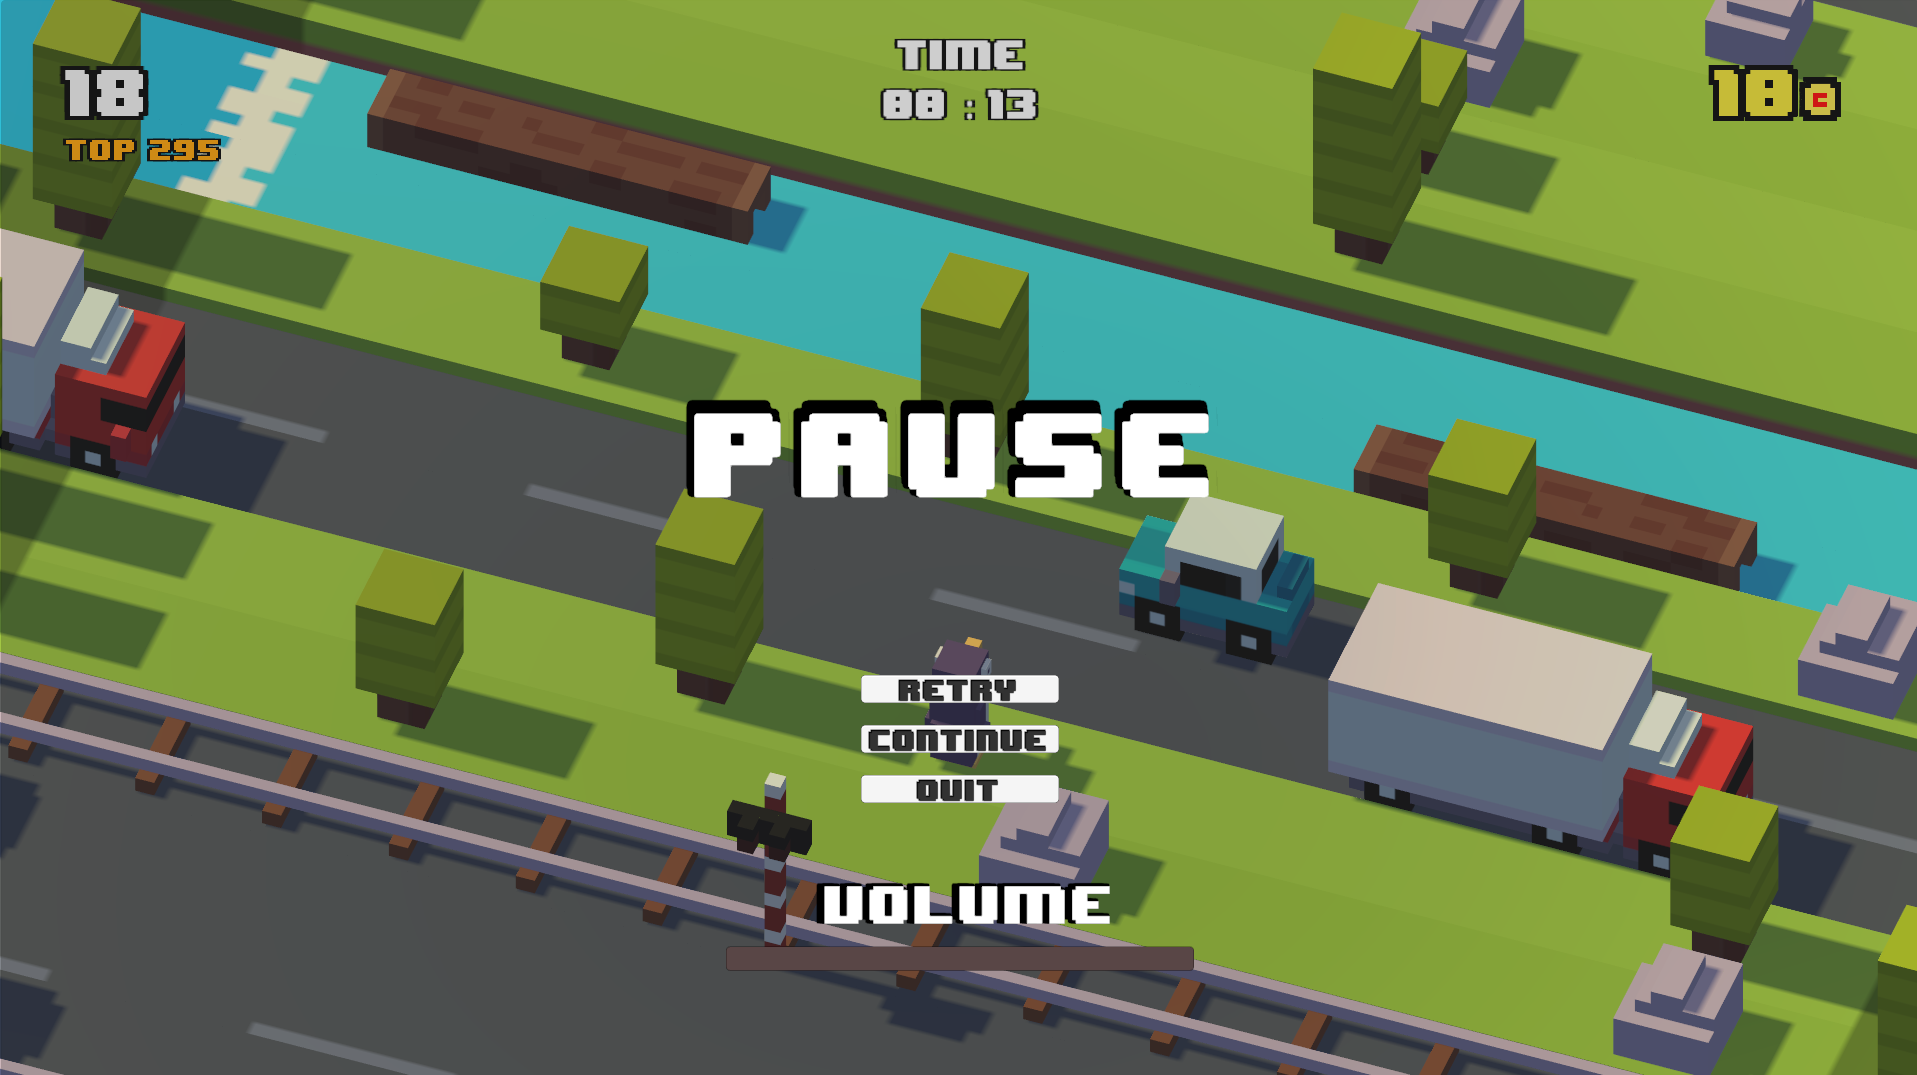
In this menu, you can:
- Click
RETRYto restart the game from the beginning. - Click
CONTINUEif you're done with your coffee and want to resume the game. - Click
QUITto return to the game's main menu. - Adjust the game's volume with the slider.
Like the in-game section, you can still view the elapsed game time, score, and coins you've collected during the session.
Game Over
If you die for any reason, whether skill-related or not 😆, the following screen will appear with a sound that should remind you of your childhood.
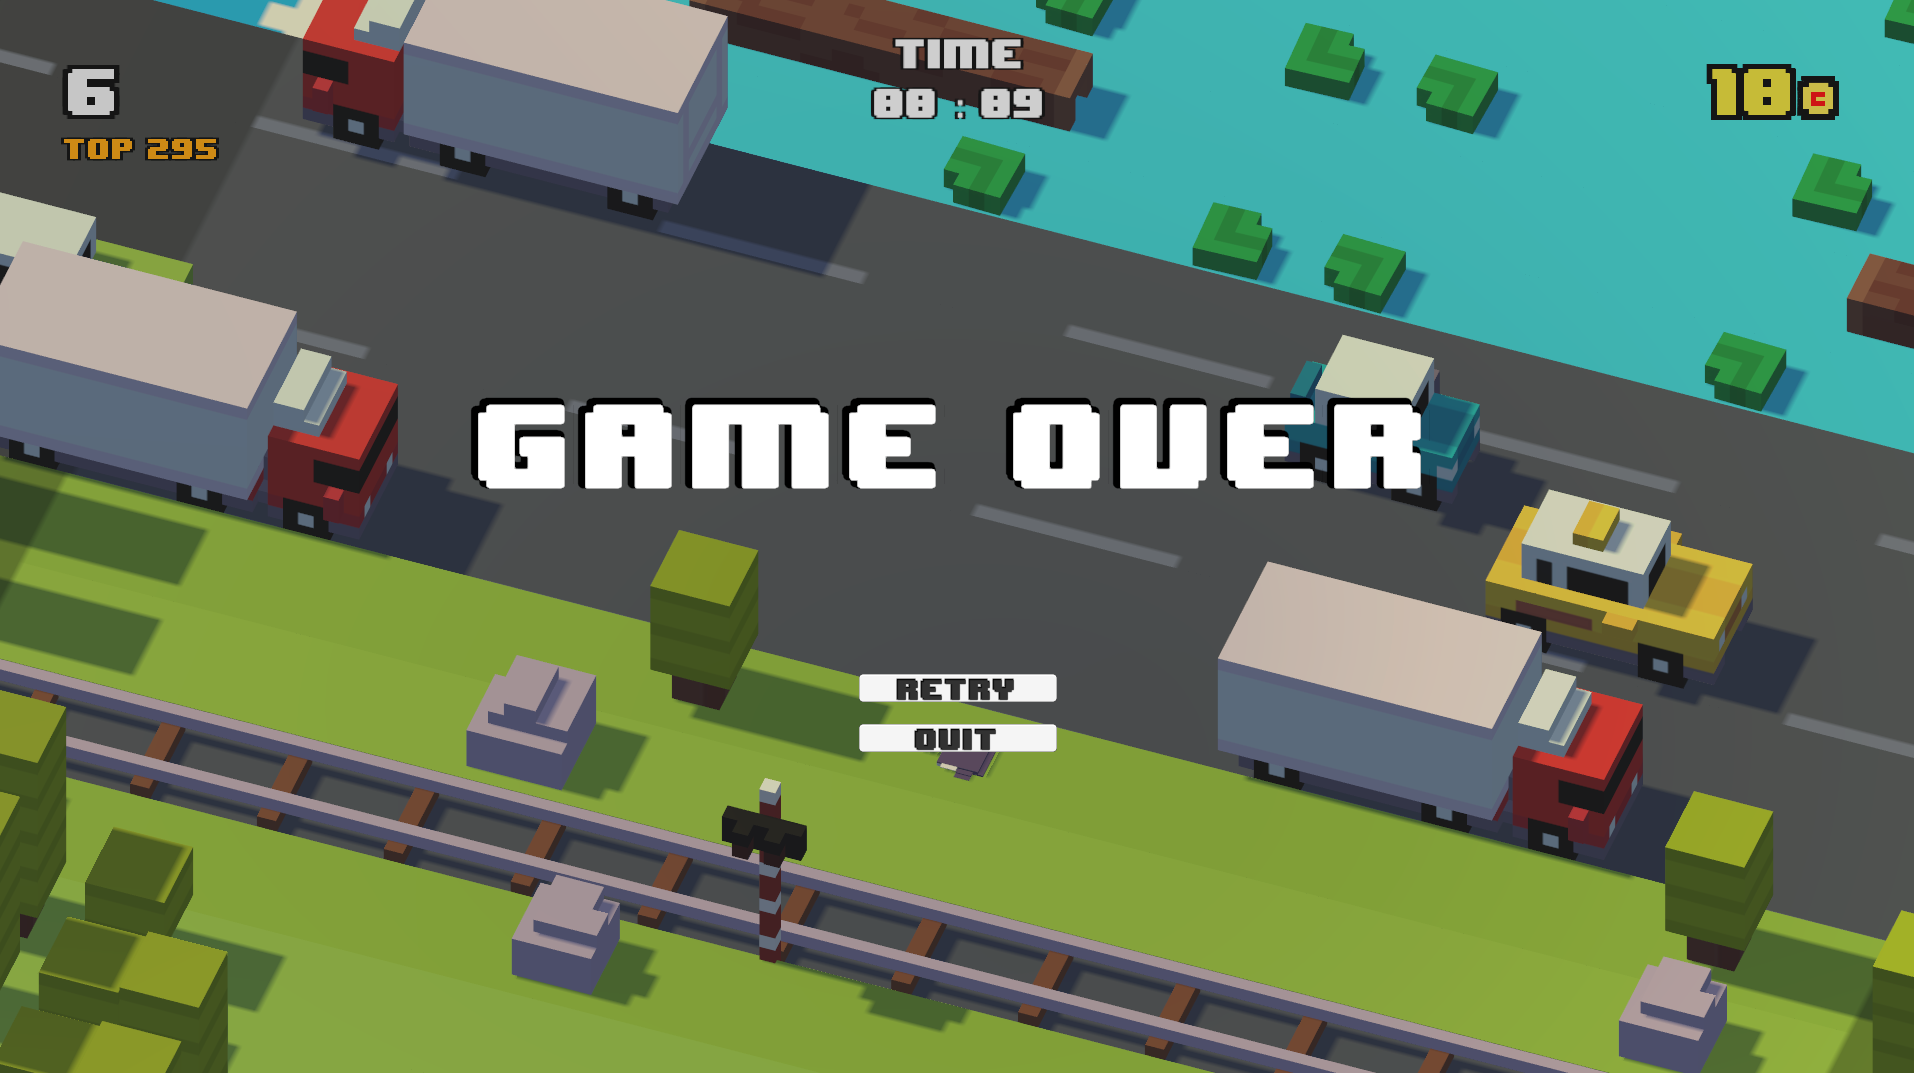
As with the previous Pause menu:
- Click
RETRYto restart the game from the beginning. - Click
QUITto return to the game's main menu.
Highscore
Now comes the leaderboard! Try to beat your score and become the top player on the leaderboard, just like in classic arcade games 🎮.
As mentioned earlier, the leaderboard is only accessible from the game's main menu.
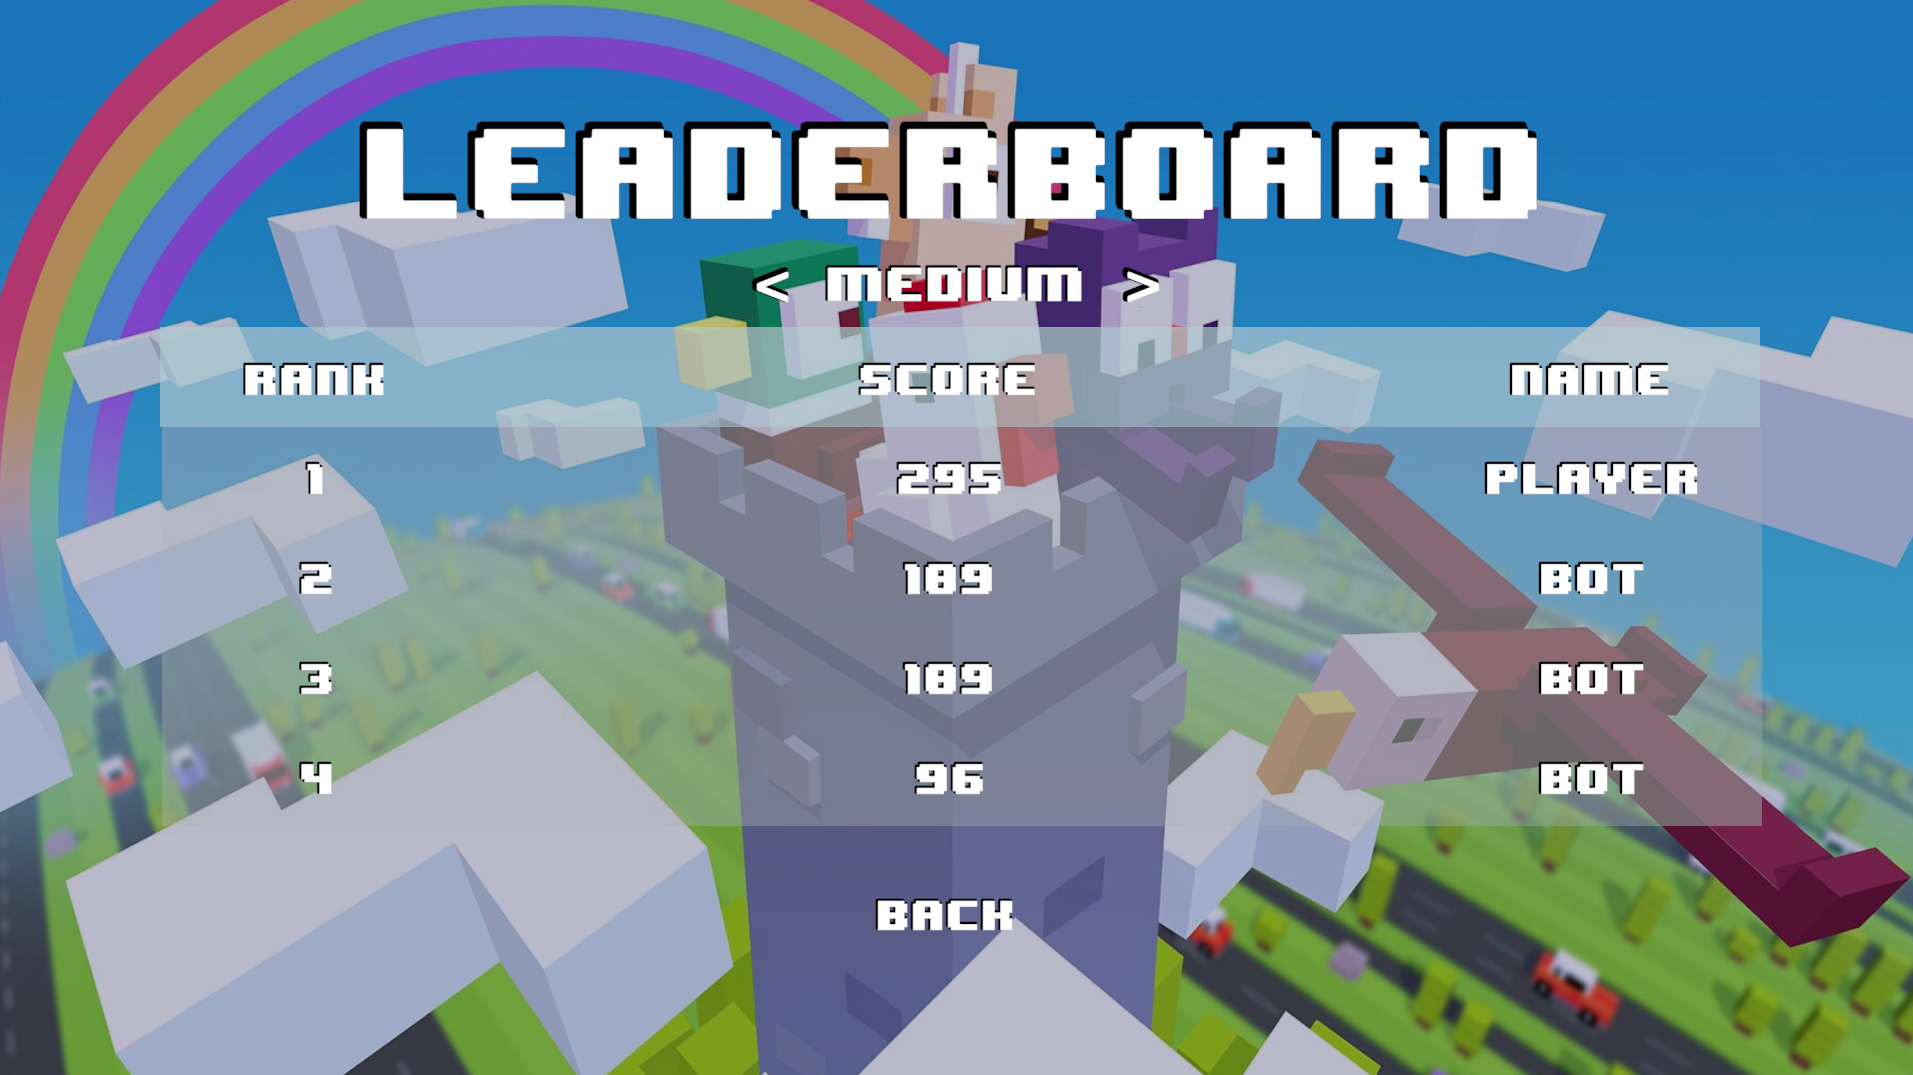
You can view the different leaderboards based on the difficulty you selected. The development team challenges you to score at least 100 points on the Hard difficulty.
Skins
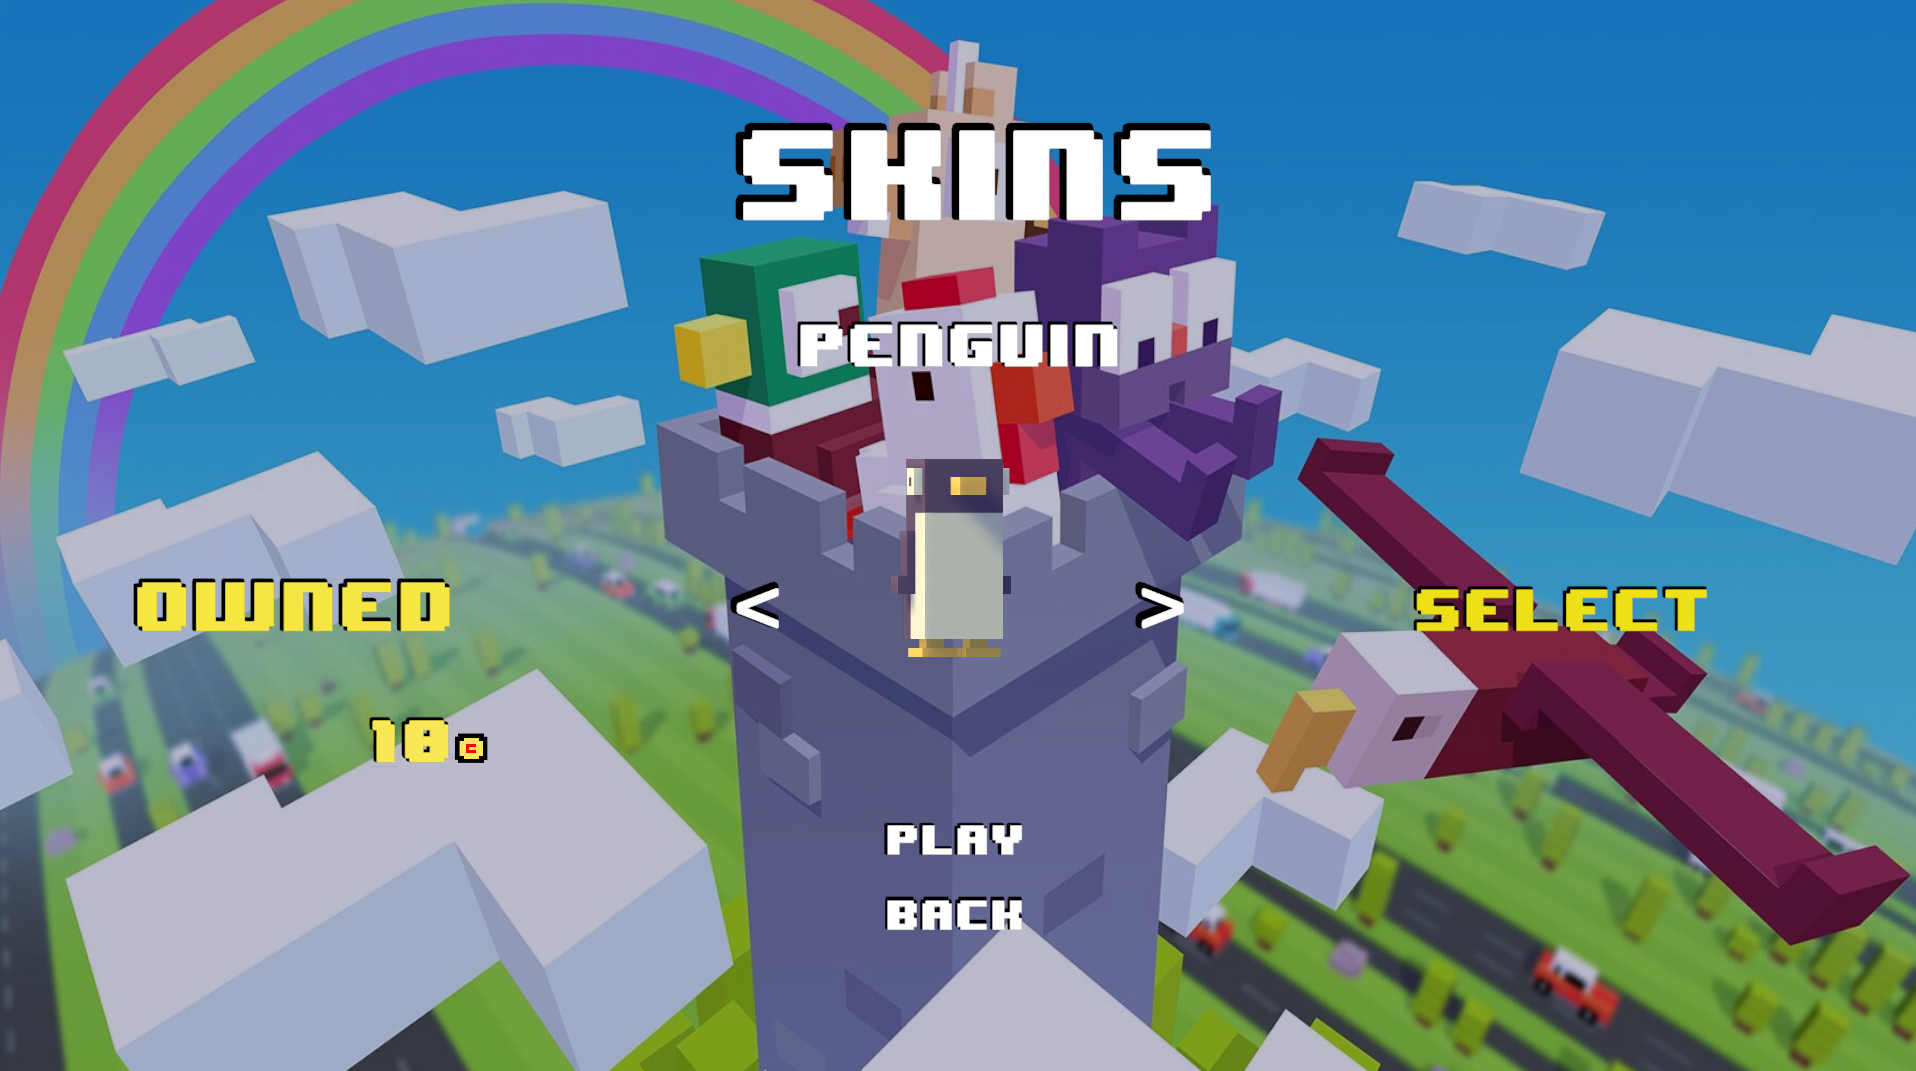
In the skins menu, you can change the character's appearance. However, nothing is free in life except for the following characters:
- Chicken, the main character who decides to cross such a dangerous road...
- Duck, the chicken's friend and rival, always trying to go further than the chicken, but at what cost...
- Penguin, because we love penguins! Long live penguins! Long live Tux! Long live Linux!!
If you're good enough at the game, you'll have even more choices, as there are currently 21 skins in the game! In this menu:
- Click
BUYto purchase skins. - Click
SELECTto choose the displayed skin. - Click
PLAYto start the game immediately. - Click
BACKto return to the previous menu to adjust other settings.
Options

In this menu, you can:
- Change the game's difficulty by clicking the arrows.
- Adjust the game's volume.
- Click
BACKto return to the previous menu.
🤖 The Robot
The robot, the bot, the AI, this part of the project was the most tedious and required the most attention, logic, and algorithm development.
From the start of the game development, we decided to use raycasts for collision detection, not just colliders.
Using the same detection logic, we developed the robot around raycasts to detect its environment, including obstacles, vehicles, trains, and water.
Some demos:
💻 Technologies Used